What this code does
This code is an example of a web application for creating, editing, and deleting tasks using Heap and JSX for rendering HTML.
Our code is conditionally divided into three components:
- Client-side
- Database
- Server-side
Let's go through them in order.
Client-side
import {jsx} from '@app/html-jsx'
The first line allows us to use HTML as markup. By default, TypeScript files include AppUI, which is suitable for creating mobile screens, but we will write this application in HTML.
app.html("/", async (ctx) => {
  let notes = await Notes.findAll(ctx, { order: { title: "asc" } });
  return (
    <html>
      ...
      <body>
        <h1>Task List</h1>
        <form id="addTaskForm" title="Create Task">
          <div>
            <input
              id="taskTitle"
              name="title"
              placeholder="Describe the task"
              required
            />
          </div>
          <div class="margin">
            <button onclick={`createTask('${createRoute.url()}')`}>
              Create Task
            </button>
          </div>
        </form>
        <div id="addTaskList">
          {notes.map((note) => {
            return (
              <div
                id="list"
                class="list"
              >
                <div class='task-container'>
                  <input
                    class="task-checkbox"
                    type="checkbox"
                    checked={note.completed}
                    onchange={`checkTask('${toggleRoute({
                      id: note.id,
                    }).url()}')`}
                  />
                  <span class="task-text">{note.title}</span>
                </div>
                <button
                  onclick={`deleteTask('${deleteRoute({ id: note.id }).url()}')`}
                  type="button"
                  class="delete"
                >
                  Delete
                </button>
              </div>
            );
          })}
        </div>
      </body>
    </html>
  );
});
The code within app.html registers an application handler that returns the page content when a user accesses this file.
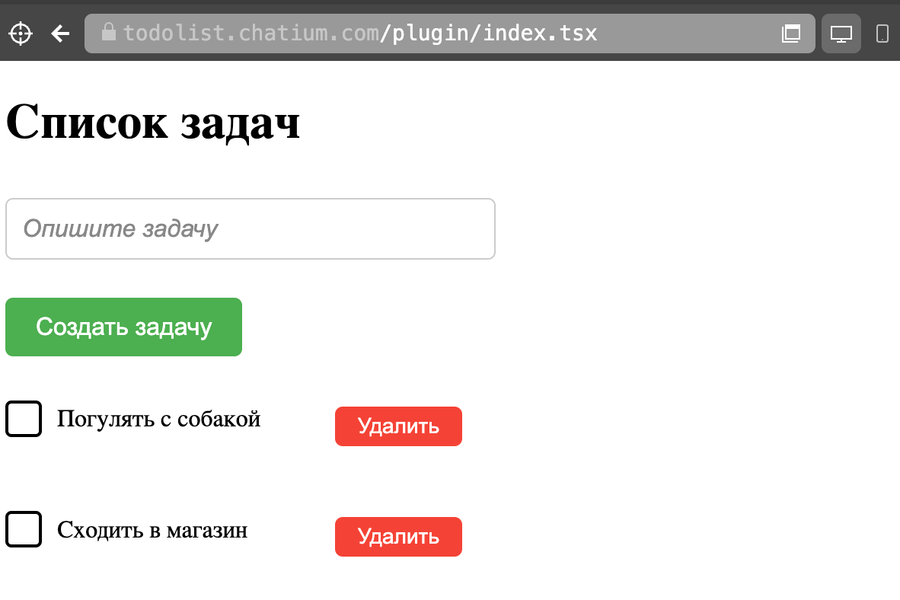
This fragment is responsible for displaying the main page of the application:
- A request is made to the database to retrieve all tasks (Notes.findAll), sorted by title.
- HTML markup is generated with a field for entering a new task and a button to create it.
For each task in the list, the following are displayed:
- The task title.
- A checkbox that shows the task status (completed or not).
- A button to delete the task.
Database
import { Heap } from "@app/heap";
In the import, we also include the Heap library, which is used for creating, using, and storing data.
You can read more about it here.
const Notes = Heap.Table("note", {
  title: Heap.String(),
  completed: Heap.Boolean(),
});
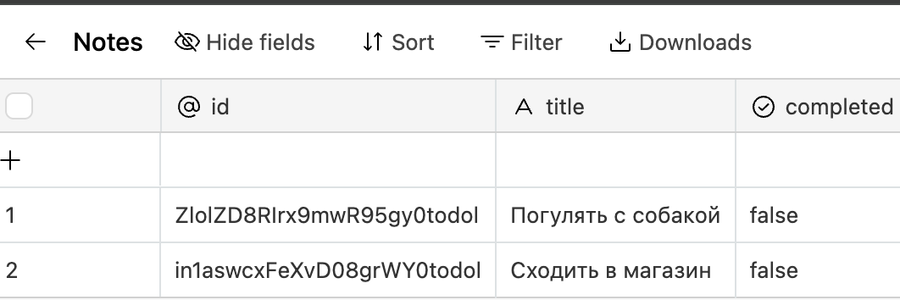
This code declares a Notes table for storing tasks, note. Each task has two fields:
- title: Title
- completed: Task status
Server-side
In this part, we define the routes that will interact with the client-side.
// Route for creating a task
const createRoute = app.post("/create", async (ctx, req) => {
  ctx.account.log("click", { json: req });
  await Notes.create(ctx, {
    title: req.body.title,
    completed: false,
  });
  return;
});

// Route for toggling the task status
const toggleRoute = app.post("/toggle/:id", async (ctx, req) => {
  ctx.account.log("done");
  let note = await Notes.getById(ctx, req.params.id);
  await Notes.update(ctx, { id: note.id, completed: !note.completed });
  return;
});

// Route for deleting a task
const deleteRoute = app.post("/delete/:id/submit", async (ctx, req) => {
  await Notes.delete(ctx, req.params.id);
  return;
});
On the client side, JavaScript is used to dynamically create tasks, change their status, and delete them.
- When the "Create Task" button is clicked, the
createTaskfunction is called, which makes a POST request to create a new task usingcreateRoute. - When the checkbox state changes, the
checkTaskfunction is called, which updates the task status via thetoggleRoute. - When the "Delete" button is clicked, the
deleteTaskfunction is called, which deletes the task via thedeleteRoute.
Script
We also need to include a JS file to make it easier to call functions.
For this, we have the script.js file.
const createTask = async(url)=> {
  const title = document.getElementById('taskTitle').value
  const response = await fetch(url, {
   method: 'POST',
   body: new URLSearchParams({
       title: title,
    }),
   headers: {
     'Content-Type': 'application/x-www-form-urlencoded',
    },
   });
  location.reload();
};

const checkTask = async(url)=> {
  const response = await fetch(url, {
     method: 'POST',
     body: {},
    });
  location.reload();
};

const deleteTask = async(url)=> {
  const response = await fetch(url, {
     method: 'POST',
     body: {},
    });
  location.reload();
};
To open this file, you need to enter the following address in your browser: https://<account.domain>/chtm/plugin/